Working with Webhooks
Webhooks are a powerful way to integrate your applications and services with Webflow, allowing you to receive real-time updates whenever specific events occur on your site. By setting up webhooks, you can automate workflows, trigger external processes, and synchronize data across different platforms without any manual intervention.
For instance, when a user submits a form on your Webflow site, a webhook can immediately notify your application, enabling you to take action instantly. This could involve sending an automated email response to the user, updating a lead record in your CRM system like HubSpot or Salesforce, or even triggering a custom workflow in an external service like Zapier.
Webhook Requests
When an event occurs, Webflow will send a POST request to a specified URL.
The webhook body will be a JSON resource object that relates to the event. The request headers will include:
- A
Content-Typeheader set toapplication/json - A
x-webflow-timestampwith the time the webhook was sent - A
x-webflow-signatureheader containing the request signature. Read on for information about validating request signatures.
Below is an example of webhook event data.
xxxxxxxxxx16{"triggerType": "form_submission","payload": {"name": "Contact Us","siteId": "65427cf400e02b306eaa049c","data": {"First Name": "Zaphod","Last Name": "Beeblebrox","email": "[email protected]","Phone Number": 15550000000},"submittedAt": "2022-09-14T12:35:16.117Z","id": "6321ca84df3949bfc6752327","formId": "65429eadebe8a9f3a30f62d0"}}
The type of event that triggered the request
The payload of data sent from Webflow
Creating a Webhook
In this tutorial, we'll walk through creating a webhook to listen for new submissions to a contact form on a site. Whenever someone submits this form, Webflow will send a notification to the specified destination. Additionally, we'll cover how to verify that the webhook requests you're receiving are genuinely from Webflow, ensuring secure and reliable communication with your application.
Looking for a Simpler Setup?
If you'd prefer a way to set up webhooks without using the API, you can easily configure them through the Webflow dashboard. Please note, that webhooks created through the dashboard will not include the request headers needed to validate request signatures.
Prerequisites
- A site token or bearer token from a Webflow Data Client App with the
forms:readscope. If you plan on verifying requests, you must authenticate via an App. - A Webflow test site. You can use the Biznus template to quickly set up a site equipped with a contact form.
- A service to accept an HTTPS request. While we'll be using webhook.site in this tutorial, you're free to choose any platform.
Before we get started working with the API, we'll first need to create a form and publish our site. If you already have a working form on your site, you can skip this step. To create a site with a form, we'll use the Biznus template, which already has a form on its contact page.
- Clone the Biznus template to your development workspace.
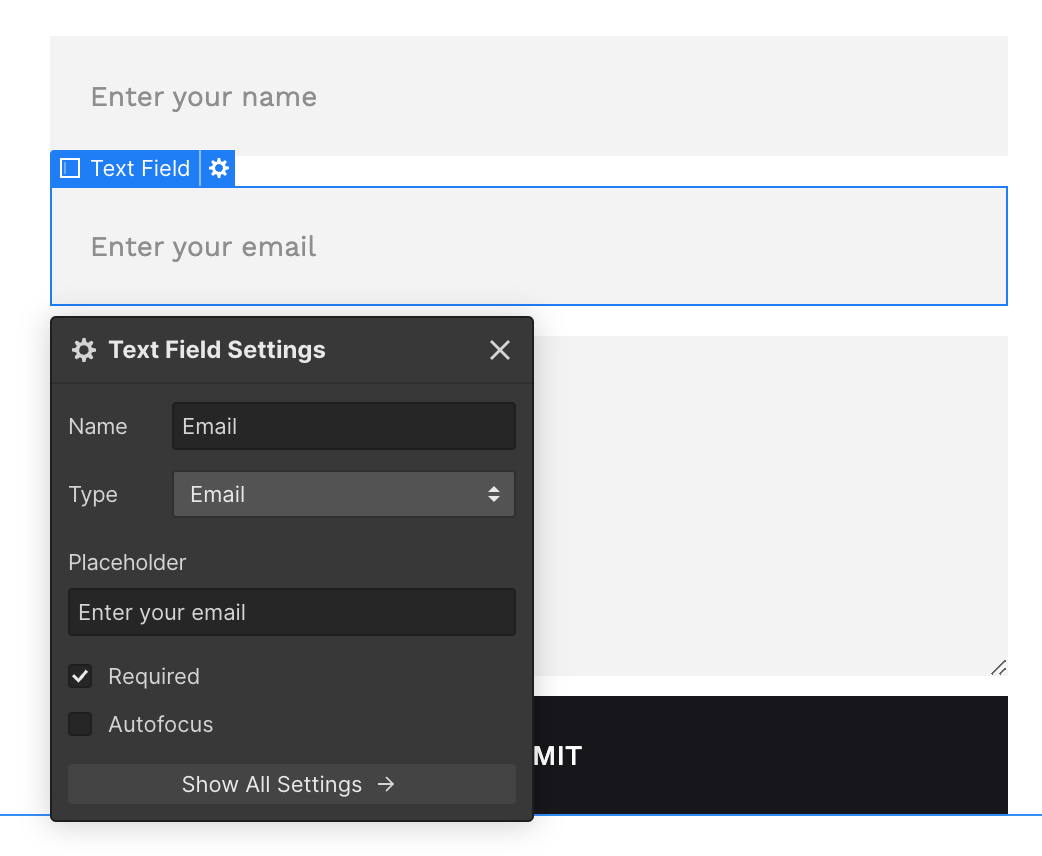
- Go to the Contact Page to view your form. Here, you can review your form's fields. Ensure each field has a unique name. These field names will be used as keys in the webhook's payload.
- Publish the site by clicking the publish button in the top right corner.
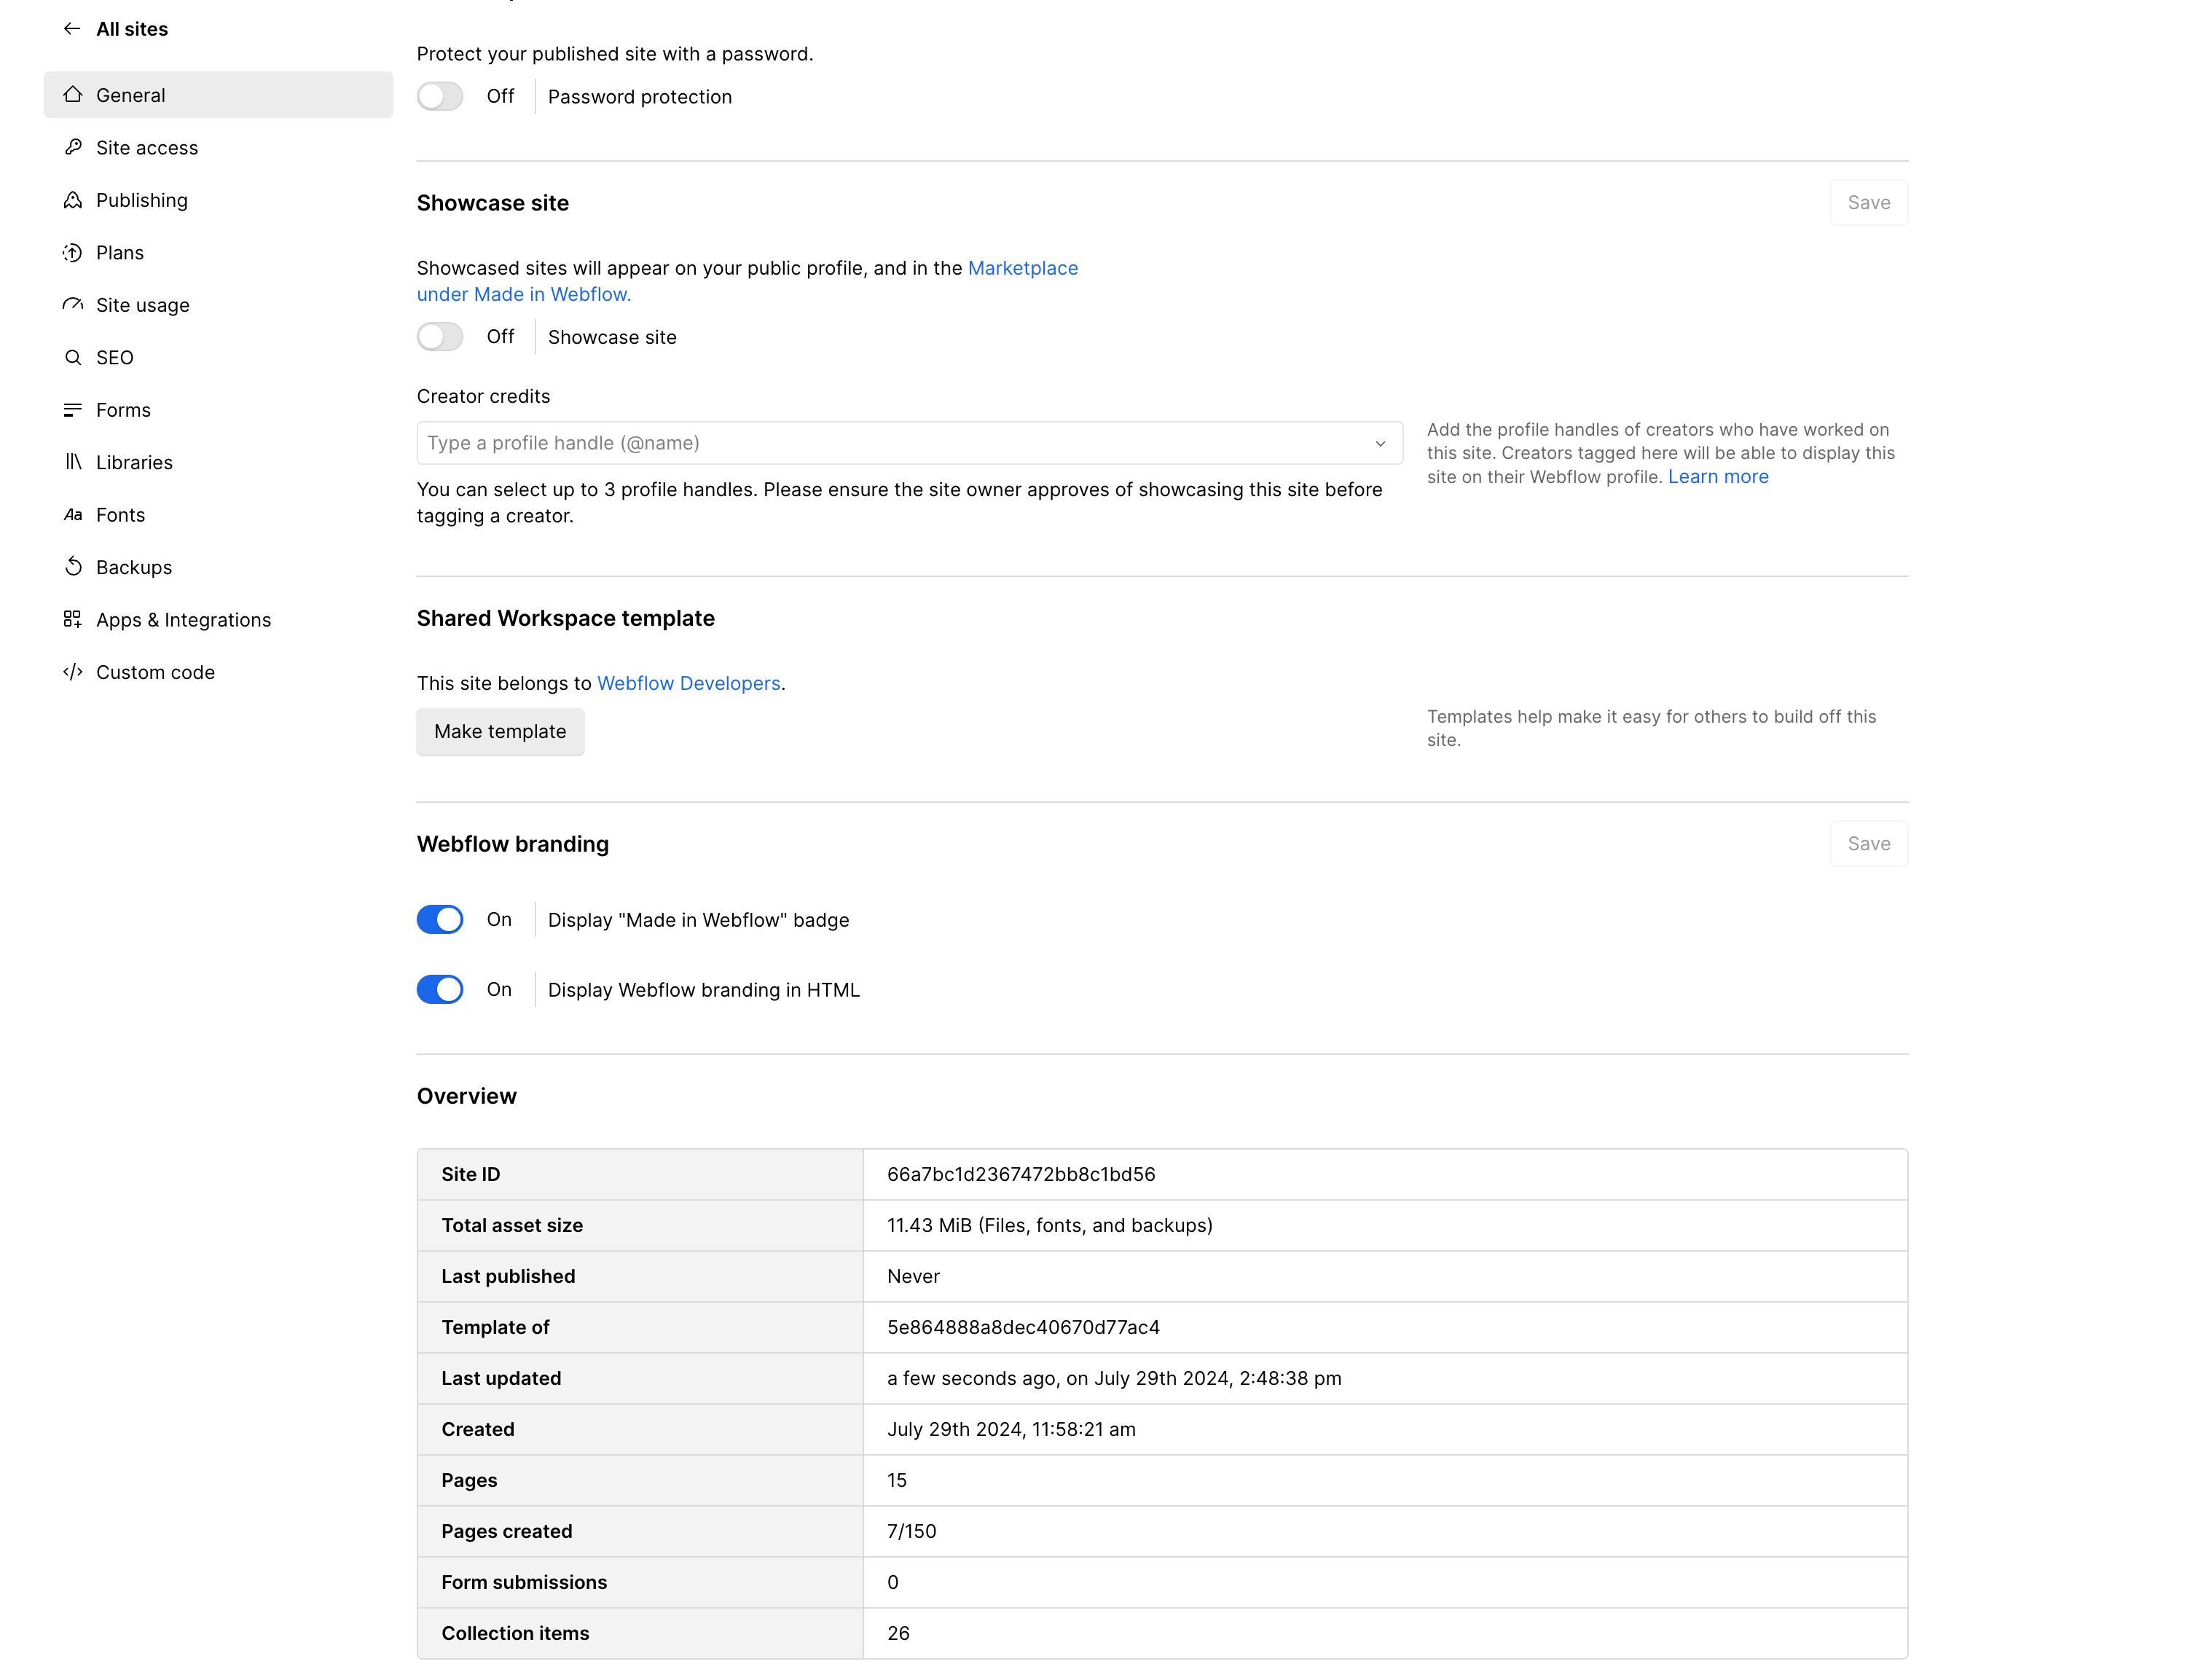
- Site ID:The unique identifier of your Webflow site.
- Trigger Type:Specific event the webhook will monitor.
- Destination URL:Unique URL prepped to accept HTTP requests.
-
Get the Site ID. There are two ways to get your Site ID, you can access the ID via site settings, or send a request to the List Sites endpoint.
- In the designer, click the Webflow Icon in the top left corner, and select "Site Settings" from the menu
- In your site settings, scroll down to the "Overview" section to find your Site ID
- Send a request to the List Sites endpoint
curl --request GET \
          --url https://api.webflow.com/v2/sites \
          --header 'accept: application/json' \
          --header 'authorization: Bearer YOUR_ACCESS_TOKEN'
const webflow = new WebflowClient({ accessToken: "YOUR_ACCESS_TOKEN" }); async function fetchSites() { try { const sites = await webflow.sites.get(); console.log(sites); } catch (error) { console.error("Error fetching sites:", error); } } fetchSites();
- Review the response to find the
displayNameof your test site and its correspondingidxxxxxxxxxx130}{"sites": [{"id": "42e63e98c9a982ac9b8b741","workspaceId": "42e63fc8c9a982ac9b8b744","createdOn": "1979-10-12T12:00:00.000Z","displayName": "Heart of Gold Spaceship","shortName": "heart-of-gold","lastPublished": "2023-04-02T12:42:00.000Z","previewUrl": "https://d1otoma47x30pg.cloudfront.net/42e63e98c9a982ac9b8b741/197910121200.png","timeZone": "DeepSpace/InfiniteImprobability","parentFolderId": "1as2d3f4g5h6j7k8l9z0x1c2v3b4n5m6","customDomains": [{"id": "589a331aa51e760df7ccb89e","url": "heartofgold.galaxy"}],"locales": {"primary": {"id": "653fd9af6a07fc9cfd7a5e57","cmsLocaleId": "653ad57de882f528b32e810e","enabled": true,"displayName": "English - Heart of Gold Standard","redirect": false,"subdirectory": "/en","tag": "The Ultimate Answer"},"secondary": [{"id": "653fd9af6a07fc9cfd7a5e58","cmsLocaleId": "653ad57de882f528b32e810g","enabled": true,"displayName": "Betelgeusian - Vogon Liaison","redirect": true,"subdirectory": "/bet","tag": "Vogon"},{"id": "653fd9af6a07fc9cfd7a5e59","cmsLocaleId": "653ad57de882f528b32e810h","enabled": false,"displayName": "Magrathean - Custom Planet Designs","redirect": true,"subdirectory": "/mg","tag": "Magrathean"}]}},{"id": "42e63e98c9a982ac9b8b742","workspaceId": "42e63fc8c9a982ac9b8b745","createdOn": "1981-10-12T12:00:00.000Z","displayName": "Marvin's Personal Blog","shortName": "paranoid-android","lastPublished": "2023-04-02T12:45:00.000Z",
-
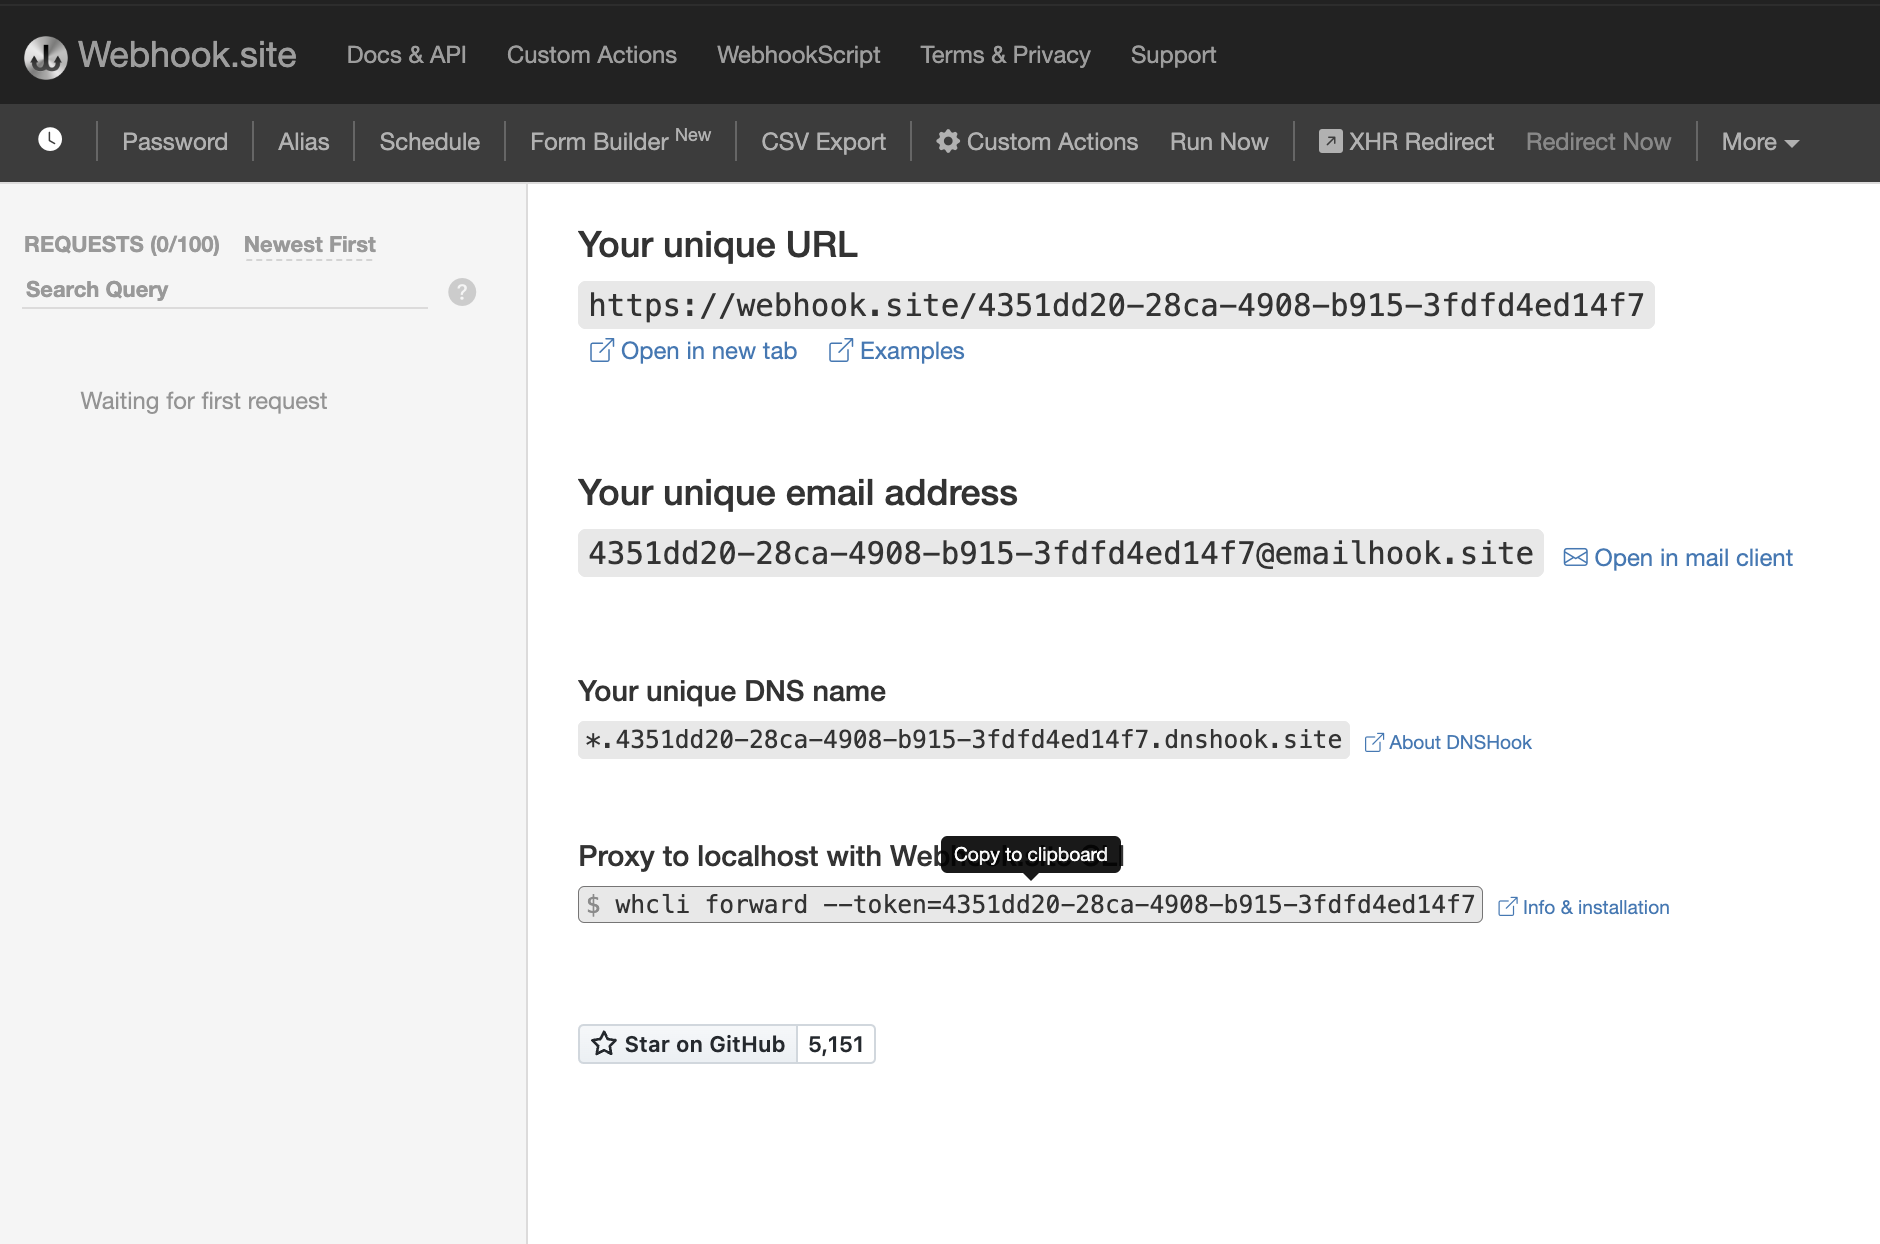
Get your destination URL. Navigate to webhook.site and copy your unique URL.
-
Send a
POSTrequest to the Create Webhook endpoint. In the request, you'll include thesite_id,url, andtriggerTypeof 'form_submission'Additionally, thecurl -X POST "https://api.webflow.com/sites/YOUR_SITE_ID/webhooks" \ -H "Authorization: Bearer YOUR_ACCESS_TOKEN" \ -H "Content-Type: application/json" \ -H "accept-version: 1.0.0" \ -d '{ "triggerType": "form_submission", "url": "https://your-webhook-url.com" }'const WebflowClient = require('webflow-api'); // Import Webflow API client async function createWebhook(req) { const accessToken = req.accessToken; // Get access token from the request const siteId = "YOUR_SITE_ID"; // Replace with your actual Site ID const webflow = new WebflowClient({ accessToken }); // Initialize Webflow client try { const webhook = await webflow.webhooks.create(siteId, { triggerType: 'form_submission', // Trigger type for the webhook url: "https://your-webhook-url.com" // Replace with your webhook URL }); console.log('Webhook created successfully:', webhook); return webhook; } catch (error) { console.error('Error creating webhook:', error.message); // Handle the error appropriately, e.g., return an error response or log the error } } // Call the function with the request object containing the accessToken createWebhook(req);form_submissiontrigger supports afilterparameter, allowing you to specifiy the name of the form you'd like to recieve notifications for. This is particularly helpful if you have multiple forms on a site.Use our interactive API Docs to send requests
You can also use the interactive API Reference to quickly send a POST request to the Create Webhook endpoint without writing any code.
-
Review the response. After successfully establishing your webhook, you should receive a confirmation similar to the one shown below:
{
        "id": "582266e0cd48de0f0e3c6d8b",
        "triggerType": "form_submission",
        "siteId": "562ac0395358780a1f5e6fbd",
        "workspaceId": "4f4e46fd476ea8c507000001",
        "createdOn": "2022-11-08T23:59:28.572Z",
        "lastTriggered": "2023-02-08T23:59:28.572Z",
        "filter": null,
        "url": "https://webhook.site/7f7f7f7f-7f7f-7f7f-7f7f-7f7f7f7f7f7f"
      }
POST request from Webflow. If the request is successful, you'll see the Request Details, Headers, and Payload sections. These details should match the JSON object shown below.
    Content-Type: application/json
    x-webflow-timestamp: 1722370035277
    x-webflow-signature: cb6162d8daf6573c658805a5f431adab25f56faf6c601935067d3957a161dfeb

    {
    "triggerType": "form_submission",
    "payload": {
      "name": "Email Form",
      "siteId": "65427cf400e02b306eaa049c",
      "data": {
        "Email 2": "[email protected]"
      },
      "submittedAt": "2024-07-30T20:07:15.220Z",
      "id": "66a947f35b9d7ba400e22733",
      "formId": "65429eadebe8a9f3a30f62d7"
    }
  }
Notice the headers included in the response:
x-webflow-timestampandx-webflow-signature. These headers are crucial for verifying the authenticity of the webhook. Refer to the section below for details on how to use these headers to validate the webhook signature.
Webhook Retries
Your service should return a 200 response to show that the webhook was successfully captured. If the response status is anything else, the webhook will be retried up to three more times at which point the request will be considered failed and will no longer be retried.
Failure Conditions
Webflow considers the following scenarios as failure conditions:
- Non-200 HTTP status code response: If we receive any response other than a valid HTTP 200 response, it is regarded as a failure.
- Redirects: If the webhook encounters redirects while attempting to deliver the payload, it will be treated as a failure.
- SSL Certificate Issues: If we cannot successfully negotiate or validate your server's SSL certificate, it will be marked as a failure.
- Timeouts: Webflow expects a swift response during webhook delivery. If there are prolonged delays in receiving a response from your server, it will be considered a failure.
Deactivation of Webhooks
If Webflow repeatedly encounters failure conditions while attempting to deliver a webhook payload, we will take the following action:
- Deactivation: We will deactivate your webhook to prevent further delivery attempts.
- Notification: You will be notified of the webhook deactivation via email.
To reactivate your webhook or if you have any questions regarding a deactivated webhook, please don't hesitate to reach out to our support team.
Limits
Understanding the limits imposed by Webflow can help you design and manage your webhooks more efficiently:
| Criteria | Limitation |
|---|---|
Maximum webhooks for a specific trigger_type | 75 |
| Maximum number of retry attempts after an unsuccessful webhook call | 3 |
| Interval (in minutes) between each retry | 10 |
Event types
This is the full list of webhook events available in Webflow. For complete documentation of webhook events with payloads, please see the webhook events documentation.
| Event | Description |
|---|---|
form_submission | Details about a form submission, including form name, site ID, data submitted, submission timestamp, and form ID. |
site_publish | Details about a site publish event, including site ID, published timestamp, domains, and user who published the site. |
page_created | Information about a new page event, including site ID, page ID, page title, and creation timestamp. |
page_metadata_updated | Metadata of a page is updated and published, including site ID, page ID, page title, and last updated timestamp. |
page_deleted | Information about a deleted page, including site ID, page ID, page title, and deletion timestamp. |
ecomm_new_order | Information about a new order, including order ID, status, customer information, shipping details, and purchased items. |
ecomm_order_changed | Details about an order that changed, including order ID, status, comments, customer information, and updated order details. |
ecomm_inventory_changed | Information about the inventory item that changed, including item ID, quantity, and inventory type. |
user_account_added | Information about a new user account, including user ID, email verification status, account creation date, and status. |
user_account_updated | Details about an updated user account, including user ID, email verification status, last updated timestamp, and access groups. |
user_account_deleted | Information about a deleted user account, including user ID, email verification status, and account creation date. |
collection_item_created | Details about a newly created collection item, including item ID, site ID, workspace ID, collection ID, creation date, and draft status. |
collection_item_changed | Information about an updated collection item, including item ID, site ID, workspace ID, collection ID, last updated date, and item details. |
collection_item_deleted | Details about a deleted collection item, including item ID, site ID, workspace ID, and collection ID. |
collection_item_unpublished | Information about an unpublished collection item, including item ID, site ID, workspace ID, and collection ID. |
Validating Request Signatures
Webflow provides a method for your App to verify that requests are genuinely coming from the Webflow API by using signatures included in the request headers.
x-webflow-timestamp: The time the webhook was sent, represented in Unix epoch time format.x-webflow-signatureThe request signature, formatted as a SHA-256 hash.
Only OAuth Apps carry these signatures.
Webhooks originating from a site dashboard or via a Site's API Key won't have request signatures. To benefit from this security feature, create your webhooks through an OAuth application.
To ensure the authenticity of a webhook request from Webflow, validate the request signature using the provided headers and your OAuth application's client secret.
Steps to Validate the Request Signature
- Generate the HMAC Hash:
- Retrieve the timestamp from the
x-webflow-timestampheader. - Concatenate the timestamp and the request body with a colon (
:) separator. The format should be:timestamp + ":" + JSON.stringify(request_body)data = f"{request_timestamp}:{request_body_json}" - Use your OAuth application's client secret and the SHA-256 hashing algorithm to generate the HMAC hash. The client secret serves as the key for the HMAC process.
- Retrieve the timestamp from the
- Compare the Generated Hash with the Provided Signature:
Compare the generated HMAC hash with thex-webflow-signatureheader from the request. A match confirms the request's legitimacy; otherwise, it should be considered potentially tampered with or fraudulent. - Verify the Timestamp:
Check thex-webflow-timestampheader to ensure the request is recent. A request older than 5 minutes may indicate a replay attack. Calculate the request's age as follows:If the difference exceeds 5 minutes (300,000 milliseconds), consider the request potentially compromised.currentTime - Number(request_timestamp)current_time - int(request_timestamp)
See below for examples that accept an incoming HTTPS request and validate the signature:
const express = require('express');
const crypto = require('crypto');
const bodyParser = require('body-parser');

const app = express();
const PORT = 3000;
const CLIENT_SECRET = 'your_client_secret'; // Replace with your Webflow OAuth application's client secret

app.use(bodyParser.json()); // Parse JSON request bodies

app.post('/webhook', (req, res) => {
  // Step 1: Extract headers and body from the request
  const requestBody = JSON.stringify(req.body);
  const timestamp = req.headers['x-webflow-timestamp'];
  const providedSignature = req.headers['x-webflow-signature'];

  // Step 2: Verify the signature
  if (!verifyWebflowSignature(CLIENT_SECRET, timestamp, requestBody, providedSignature)) {
    return res.status(400).send('Invalid signature'); // Respond with a 400 Bad Request if verification fails
  }

  // Process the webhook request as necessary
  console.log('Webhook verified and received:', req.body);
  res.status(200).send('Webhook received');
});

function verifyWebflowSignature(clientSecret, timestamp, requestBody, providedSignature) {
  try {
    // Step 3: Convert the timestamp to an integer
    const requestTimestamp = parseInt(timestamp, 10);

    // Step 4: Generate the HMAC hash
    const data = `${requestTimestamp}:${requestBody}`;
    const hash = crypto.createHmac('sha256', clientSecret)
                       .update(data)
                       .digest('hex');

    // Step 5: Compare the generated hash with the provided signature
    if (!crypto.timingSafeEqual(Buffer.from(hash, 'hex'), Buffer.from(providedSignature, 'hex'))) {
      throw new Error('Invalid signature');
    }

    // Step 6: Validate the timestamp (within 5 minutes)
    const currentTime = Date.now();
    if (currentTime - requestTimestamp > 300000) { // 5 minutes in milliseconds
      throw new Error('Request is older than 5 minutes');
    }

    return true; // The request is valid

  } catch (err) {
    console.error(`Error verifying signature: ${err.message}`);
    return false;
  }
}

app.listen(PORT, () => {
  console.log(`Server is running on port ${PORT}`);
});
import hashlib
import hmac
import json
import time
from flask import Flask, request, abort

app = Flask(__name__)

@app.route('/webhook', methods=['POST'])
def webhook():
    # Step 1: Extract headers and body from the request
    client_secret = 'your_client_secret'  # Your Webflow OAuth application's client secret
    request_body = request.get_data(as_text=True)
    request_json = json.loads(request_body)
    timestamp = request.headers.get('x-webflow-timestamp')
    provided_signature = request.headers.get('x-webflow-signature')

    # Step 2: Verify the signature
    if not verify_webflow_signature(client_secret, timestamp, request_body, provided_signature):
        abort(400, 'Invalid signature')  # Respond with a 400 Bad Request if verification fails

    # Process the webhook request as necessary
    return 'Webhook received', 200

def verify_webflow_signature(client_secret, timestamp, request_body, provided_signature):
    try:
        # Convert the timestamp to an integer
        timestamp = int(timestamp)

        # Generate the HMAC hash
        data = f"{timestamp}:{request_body}"
        digest = hmac.new(client_secret.encode('utf-8'), data.encode('utf-8'), hashlib.sha256).hexdigest()

        # Compare the generated hash with the provided signature
        if not hmac.compare_digest(digest, provided_signature):
            raise ValueError("Invalid signature")

        # Validate the timestamp
        current_time = int(time.time() * 1000)  # Convert current time to milliseconds
        if current_time - timestamp > 300000:  # 5 minutes in milliseconds
            raise ValueError("Request is older than 5 minutes")

        return True  # The request is valid

    except Exception as e:
        print(f"Error verifying signature: {str(e)}")
        return False

if __name__ == '__main__':
    app.run(port=5000)
Updated about 1 month ago