Working with Custom Code
This guide will demonstrate how to add custom code to a pre-configured example site. You will learn how to register scripts to a site, apply them to a page, and publish the site, illustrating the complete process of managing scripts via the API.
Prerequisites
- A clone of our Code Example Site.
- A Webflow App or a Site Token with the following scopes:
sites:read,sites:write,pages:read,pages:write,custom_code:read, andcustom_code:write - An ngrok account and authentication token. We use ngrok to set up a secure tunnel for our App.
- Clone the Example Webflow Project: Clone the example Webflow site where scripts will be applied.
- Publish the site: Publish the site and explore it in your browser.
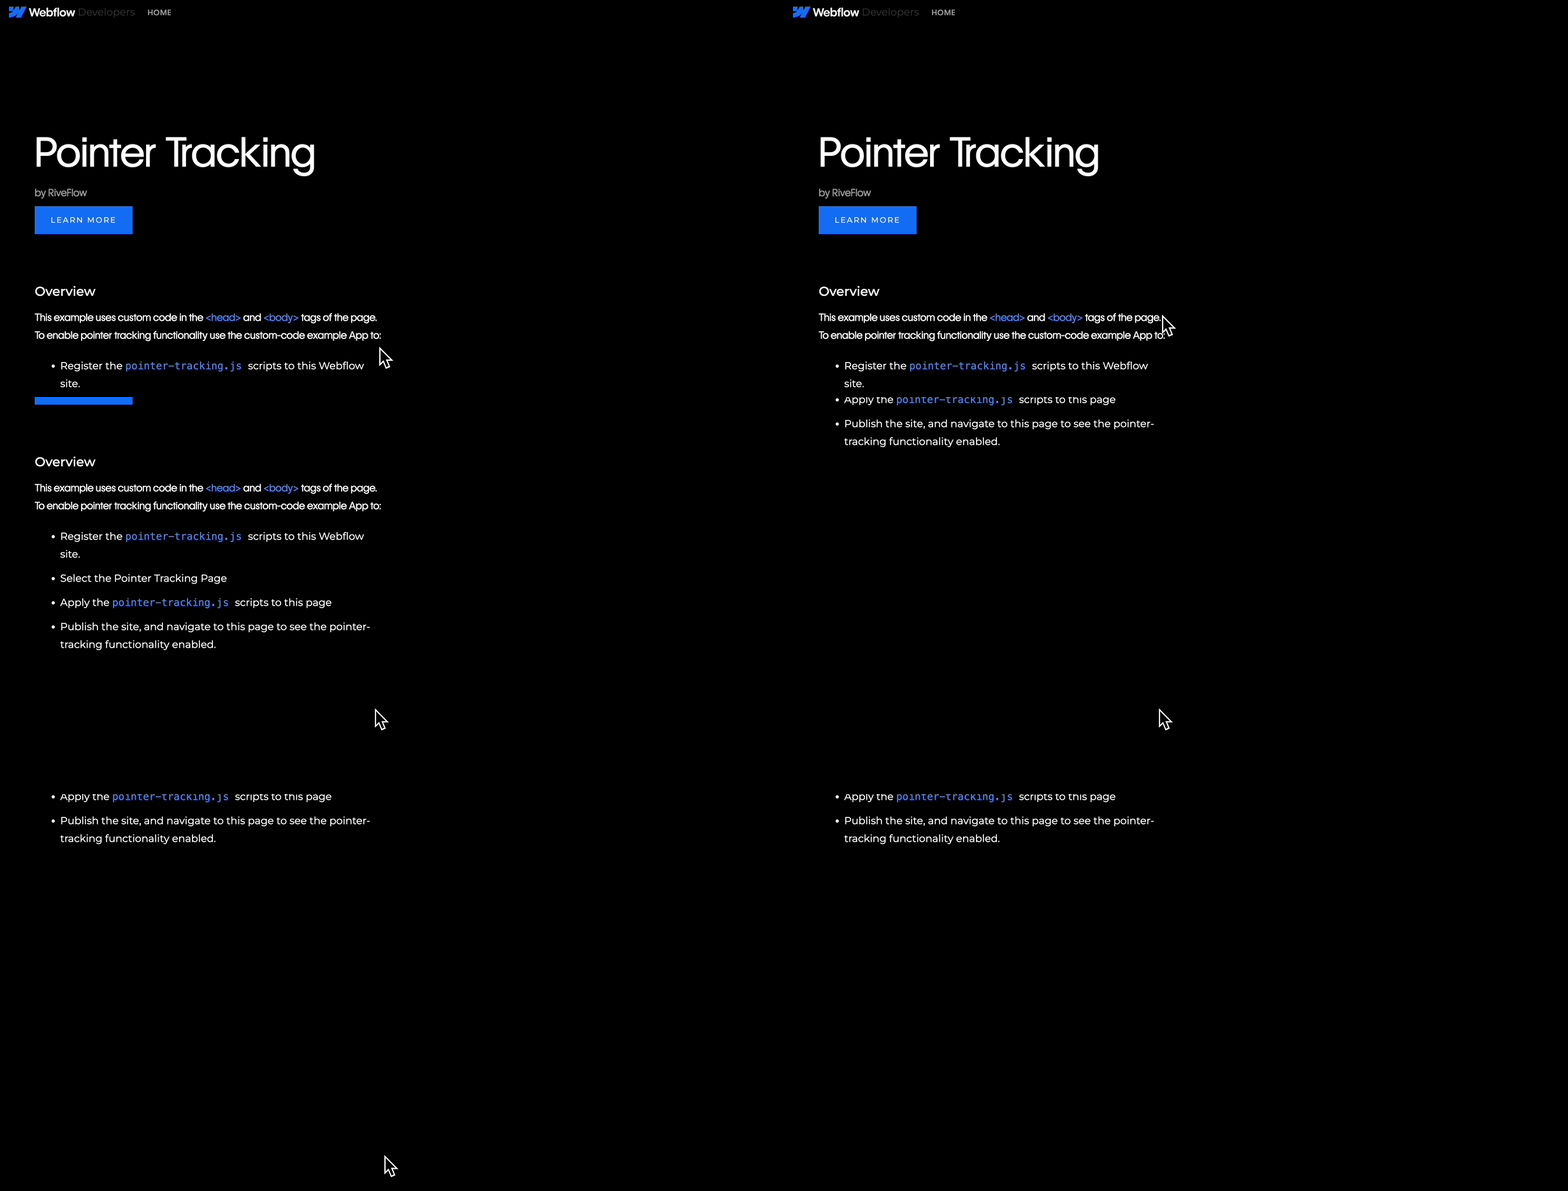
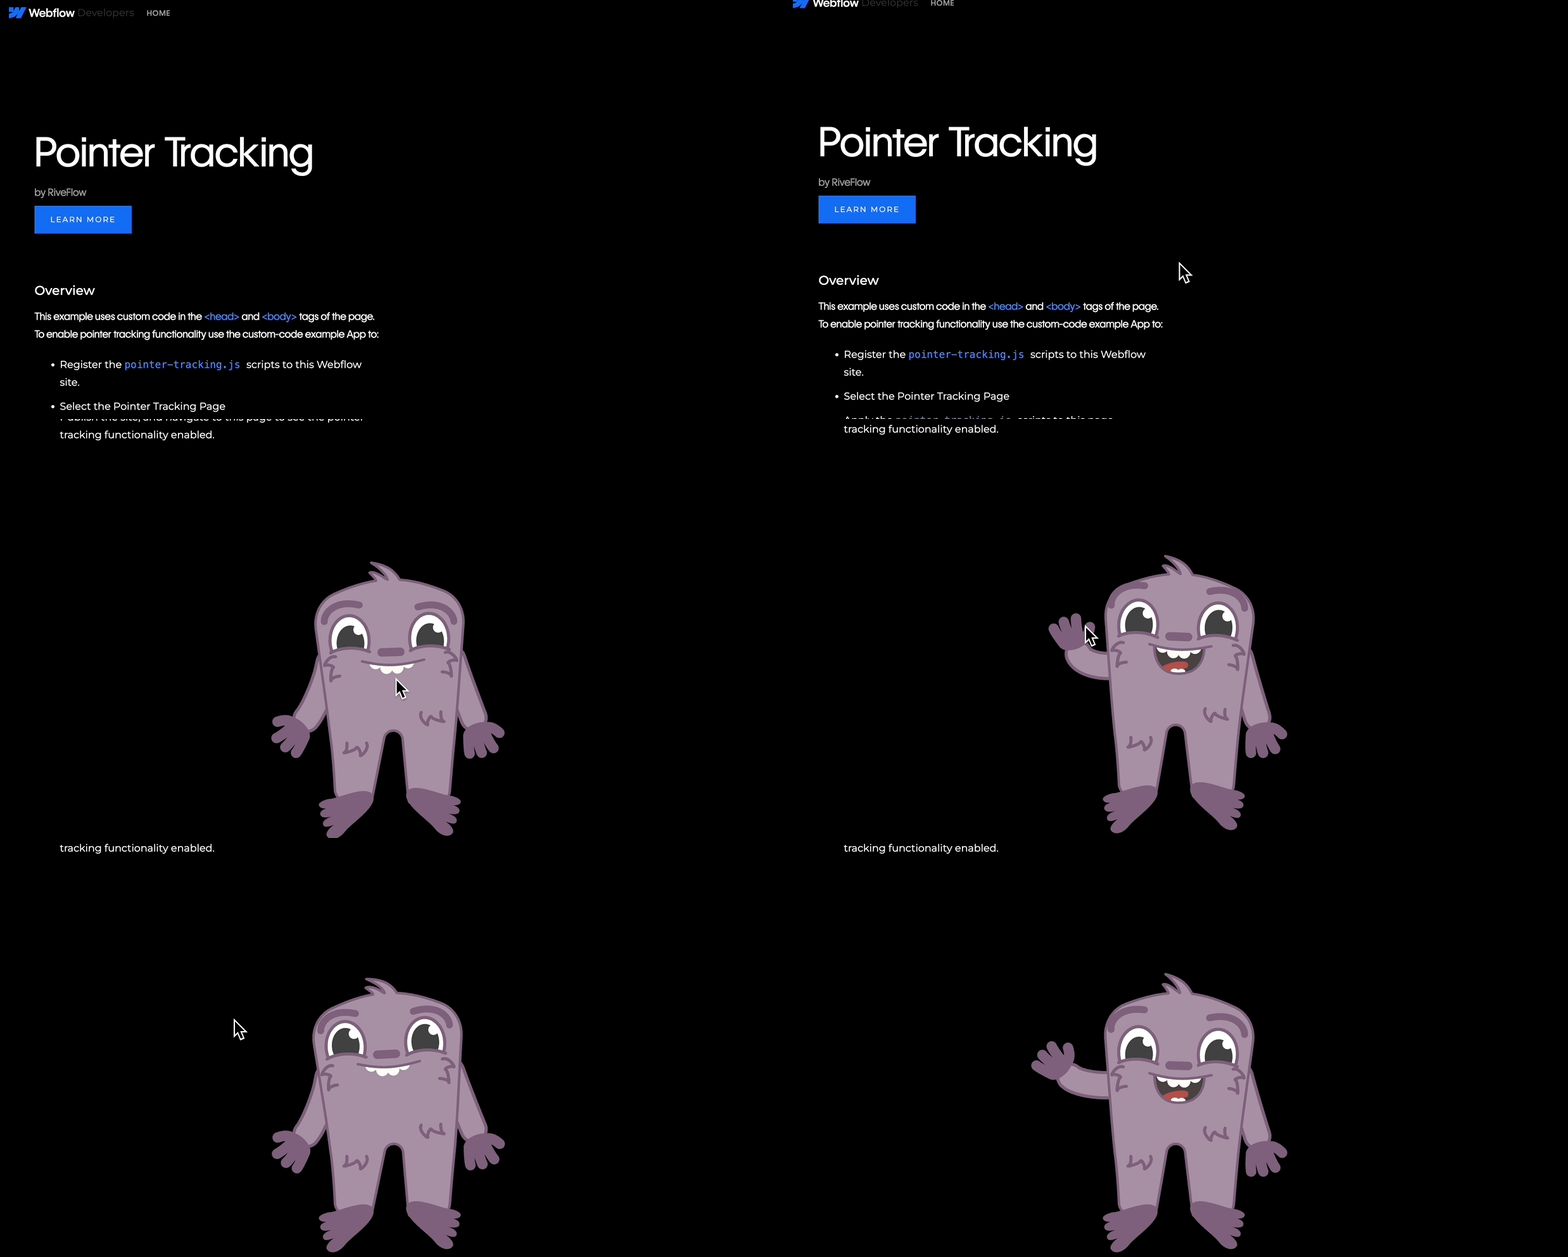
- Navigate to the “Pointer Tracking” example: The page will have an overview description of the example, and instructions on how to implement the code. In our finished version, once custom code is applied to the page, the “Pointer Tracking” example will show an animation that follows your pointer across the page.


- Clone the Project Repository
Run the following commands in your IDE to clone the example repository and install dependencies:git clone https://github.com/Webflow-Examples/custom-code-examples/tree/main cd custom-code-examples npm install npm run install-project - Configure Environment Variables
Fill out a.envfile with the necessary environment variables:WEBFLOW_CLIENT_ID=YOUR_CLIENT_ID WEBFLOW_CLIENT_SECRET=YOUR_CLIENT_SECRET NGROK_AUTH_TOKEN=YOUR_NGROK_AUTH_TOKEN PORT=8080
- Start the Project
Run the following command in your IDE to start the project:npm run dev - Update App’s Redirect URI
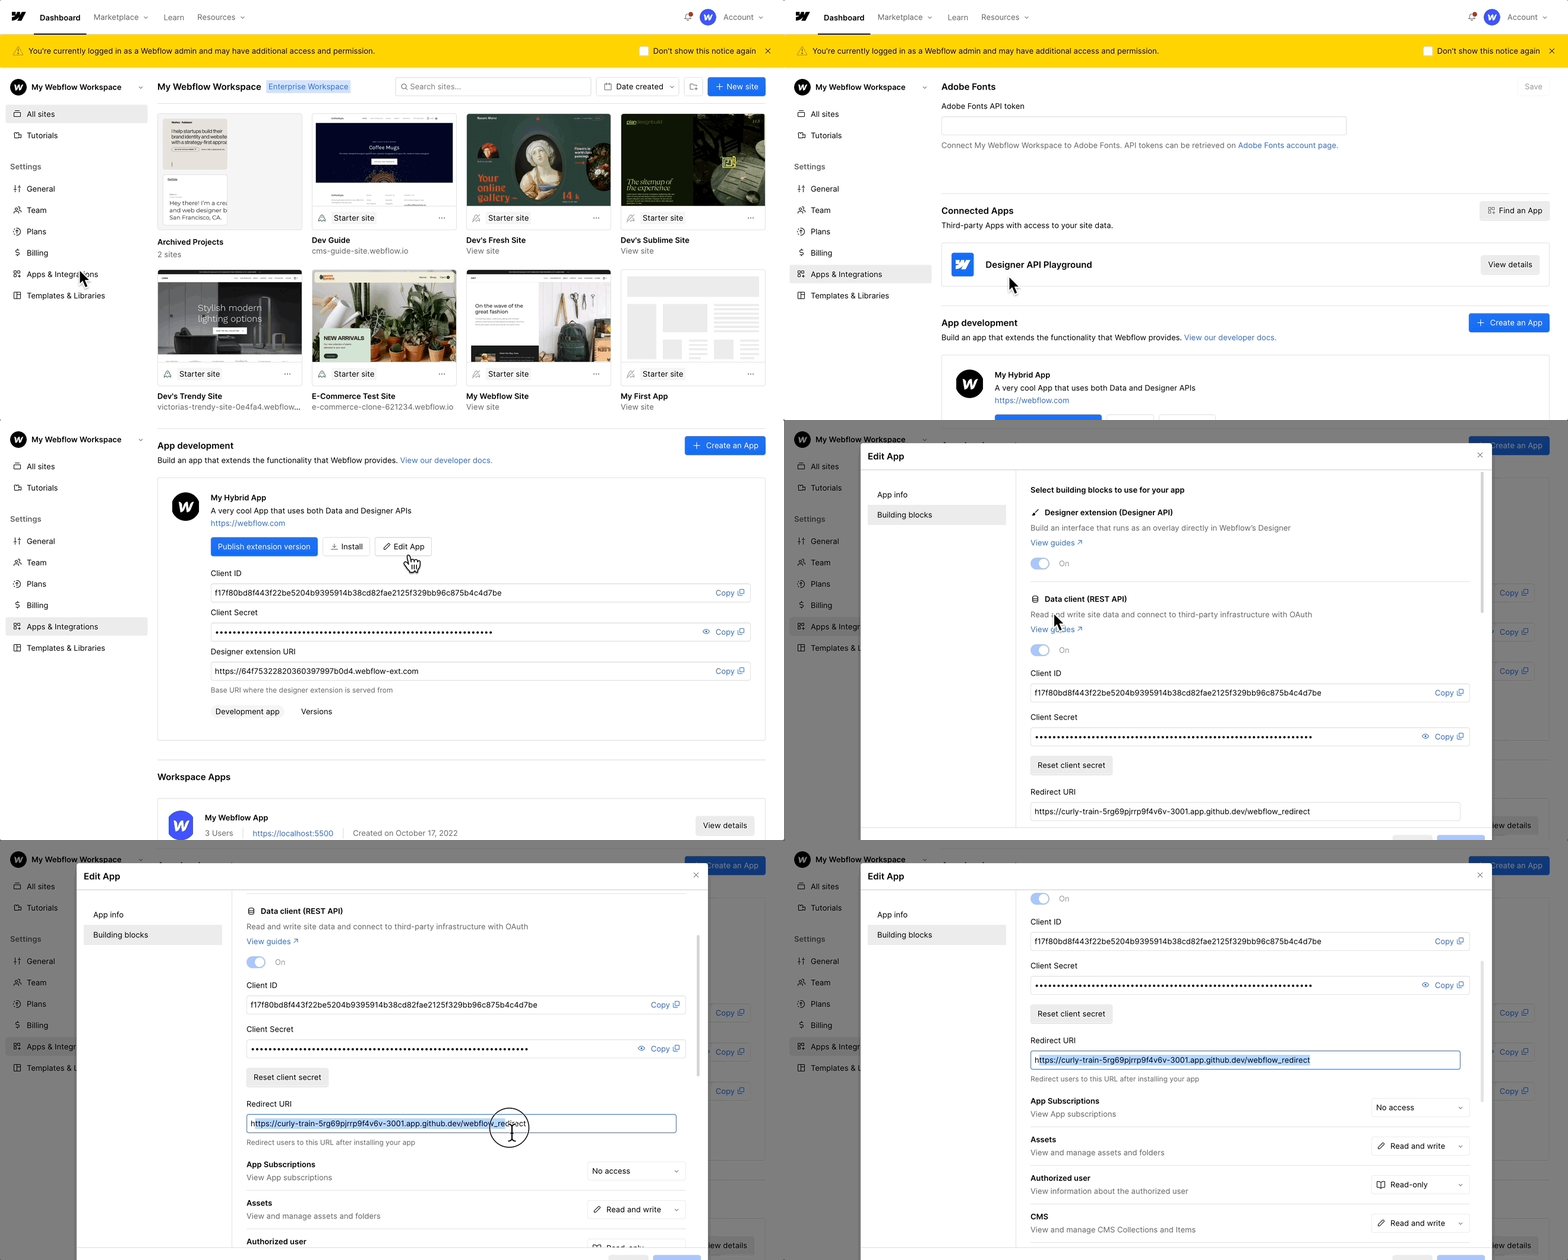
Once the server is running, copy the Redirect URI provided in the terminal. Navigate to your Webflow Workspace dashboard, go to "Apps & Integrations," and update the Redirect URI in your App settings. Save the changes.

- Authorize App
We’ll need to authorize the App to access the newly cloned example site. We’ve already set up the authorization flow in this example App. Navigate tolocalhost:8080and choose the workspaces or sites you want your App to access. Once authorized, you’ll be redirected to the App’s frontend.
To see how we configured authorization for this App, navigate to thebackendfolder and reviewcontrollers/authController.js,routes/authRoutes.js, andwebflowClientMiddleware.js. For more information on setting up authorization, read through our authorization guide.
In this step, you will register scripts necessary for implementing custom functionality on your Webflow site. The App provides three example scripts that correspond to functionalities you can implement on the example site. We'll start with Pointer Tracking, a script that enables an animation to follow your pointer around on the screen. We’d like to give Jeff McAvoy at RiveFlow a special thanks for contributing this example to the Webflow developer community.
- Choose the Pointer Tracking Example
From the list of example scripts, select "Pointer Tracking." Once selected, you’ll see a list of scripts to register that are marked inline or hosted.Hosted scripts require a
hostedLocation(the URL where the script is hosted) and anintegrityHashto verify the script's contents. The example app automates this process: it fetches the script from thehostedLocation, generates anintegrityHashto ensure the script hasn't been tampered with, and then uploads this information to the Webflow endpoint. This verification step ensures the script's integrity before it's applied to your Webflow site.The following controller logic manages the registration of hosted scripts. It fetches the script from the specified
hostedLocation, generates anintegrityHashto ensure the script's content hasn't been tampered with, and then registers the script with Webflow.backend/controllers/scriptController.jsexport const registerHostedScript = async (req, res) => { try { const siteId = req.params.siteId; // Function to get integrity hash of hosted script async function generateSRI(url) { const response = await fetch(url); const data = await response.text(); const integrity = Sri(data, ["sha256"]); return integrity; } // Generate the Integrity Hash from the hostedLocation const hostedLocation = req.body.hostedLocation; // Change from req.query to req.body const integrityHash = await generateSRI(hostedLocation); // Body of Hosted Script Request const script = { hostedLocation: hostedLocation, integrityHash: integrityHash, canCopy: true, version: req.body.version, // Change from req.query to req.body displayName: req.body.displayName // Change from req.query to req.body }; // Register Script const data = await req.webflow.scripts.registerHosted(siteId, script); res.json(data); } catch (error) { console.error("Error registering hosted script:", error); res.status(500).send("Failed to register hosted script"); } };Inline scripts require the actual JavaScript
sourceCodeto be provided. Each inline script has a limit of 10,000 characters. When providing the source code, do not include<script>tags; Webflow will handle that for you.The example app automates this process by capturing the sourceCode from the request body and registering it with Webflow. This ensures that your inline scripts are correctly formatted and within the character limit before being applied to your Webflow site.
backend/controllers/scriptController.jsexport const registerInlineScript = async (req, res) => { try { const siteId = req.params.siteId; // Create Inline Request from the body const request = { sourceCode: req.body.sourceCode, canCopy: req.body.canCopy !== undefined ? req.body.canCopy : true, // Default to true if not provided version: req.body.version, displayName: req.body.displayName, }; // Register Script const data = await req.webflow.scripts.registerInline(siteId, request); res.json(data); } catch (error) { console.error("Error registering inline script:", error); res.status(500).send("Failed to register inline script"); } }; - Provide script details
To upload a script via the API, you’ll need to provide the following details:displayName: string The name of your scriptversion: string The semantic version of your script. Each script must have a unique combination ofdisplayNameandversion. You can not overwrite scripts at this time.canCopy: boolean Define whether the script can be copied on site duplication and transfer
hostedLocationif it’s a hosted script, or thesourceCodeif it’s an inline script. - Click register
Depending on the type of script, inline or hosted, this button will send your script to the backend server, and then to the appropriate Webflow endpoint. Either:- POST https://api.webflow.com/v2/sites/{site_id}/registered_scripts/inline
- POST https://api.webflow.com/v2/sites/{site_id}/registered_scripts/hosted
- Once you’re finished registering your scripts
Click the “Next” button.
Now that a script has been registered to the Webflow site, you can use the API to apply scripts to either the entire site or a specific page. In this step, you will apply each script to the appropriate page for the chosen example.
Scripts can be applied to one of two locations:
- Header: Within the
<head>tag. - Footer: Right before the closing
</body>tag.
- Select a Page
Choose the page where you’ll apply the script. For this example, we’ll select the "Pointer Tracking" page. - View Registered Scripts
You will see a list of scripts that have been registered to your site, populated by the Get Scripts endpoint.- The list includes the script ID, version, and
hostedLocation. - Note that even inline scripts have
hostedLocationURLs, as Webflow uploads these scripts to its CDN for serving.
- The list includes the script ID, version, and
- Apply Scripts
- Header: Apply the Rive.js script to the header.
- Footer: Apply the pointer-tracking.js script to the footer.
To apply the scripts we’ve registered to the page, we’ll use the Add/Update Custom Code endpoint. This endpoint requires you to add all custom code blocks to the page. Therefore, we’ll also use the Get Custom Code endpoint to retrieve any existing applied scripts, also known as custom code blocks, and upload a complete list of code that should be on the site.
We’ve applied this logic in our example app in
backend/controllers/scriptControllers.jsexport const upsertPageCustomCode = async (req, res) => { const pageId = req.params.pageId; const { selectedScript, version } = req.body; // Define the function to apply scripts to the page const applyScripts = async (scriptApplyList) => { try { const data = await req.webflow.pages.scripts.upsertCustomCode( pageId, scriptApplyList ); res.json(data); } catch (error) { console.error("Error adding/updating page-level custom code:", error); res.status(500).send("Failed to add/update page-level custom code"); } }; try { // Get Existing Scripts const response = await req.webflow.pages.scripts.getCustomCode(pageId); const existingScripts = response.scripts || []; const newScript = { id: selectedScript, location: req.query.location, version: version, }; existingScripts.push(newScript); const scriptApplyList = { scripts: existingScripts, }; console.log(scriptApplyList); // Apply the scripts await applyScripts(scriptApplyList); } catch (error) { console.error("Failed to fetch scripts", error); const scriptApplyList = { scripts: [ { id: selectedScript, location: req.query.location, version: version, }, ], }; // Apply the scripts in case of error fetching existing scripts await applyScripts(scriptApplyList); } }; - Bonus: Check the Page in the Designer
The Webflow Designer allows users to see how apps integrate code into their sites. After applying a script to a site or page, you can view it in the Designer's settings.- Open the Webflow Designer.
- Go to the page settings for "Pointer Tracking."
- Scroll down to the Custom Code section to see the script your app added.

Before you can see your scripts in action, you’ll need to publish your entire site. Click the "Publish Site" button to publish your site using the Publish Site endpoint.
Once your site is published, click "View Page" to go directly to your Pointer Tracking page. You should now see a fun animation that follows your pointer around the page.


Next Steps
Awesome! Now that you’ve got the hang of custom code, here are some other cool things you can do:
- Apply More Examples: Use the app to explore and apply more example scripts.
- Add Your Own Custom Code: Use the API to add your own custom code examples and see them in action on your Webflow site.
Keep experimenting and enhancing your Webflow site with custom scripts!
Updated 2 months ago
