Getting Started
Now that we've gotten a good handle on what Data Clients can do, let's try creating an App that gets an Authorization from a user, and makes an API call to the Sites endpoint.
In this guide, we'll:
- Setup your local development environment
- Create a server and run a starter Node.js App
- Authenticate our App via OAuth 2.0 and make your first REST API call
Prerequisites
To successfully follow along with this guide, please ensure your system meets the following requirements:
- A Webflow site for development and testing
- A registered App on your workspace. If you haven't registered an App, follow along with our Registration guide to create Register your first App with Webflow.
Tools:
- Terminal
- Code Editor
- Browser
- Node.js / npm
Knowledge of:
- Single-Page Web Applications
- HTML, CSS
Step 1: Setup your local development environment
Before we start working with our App, we'll want to configure our development environment so that we can connect with Webflow.
Webflow requires Apps to redirect to a publicly-available HTTPS URI, which can be tricky when testing locally. In this guide, we'll be using ngrok, a service that grants you a unique, publicly accessible url that proxies all requests to your locally running web server.
- Sign up for a free ngrok account
- Install ngrok via Homebrew by typing the following code in your terminal
$ brew install ngrok - Authenticate ngrok with your auth token by typing the following code in your terminal
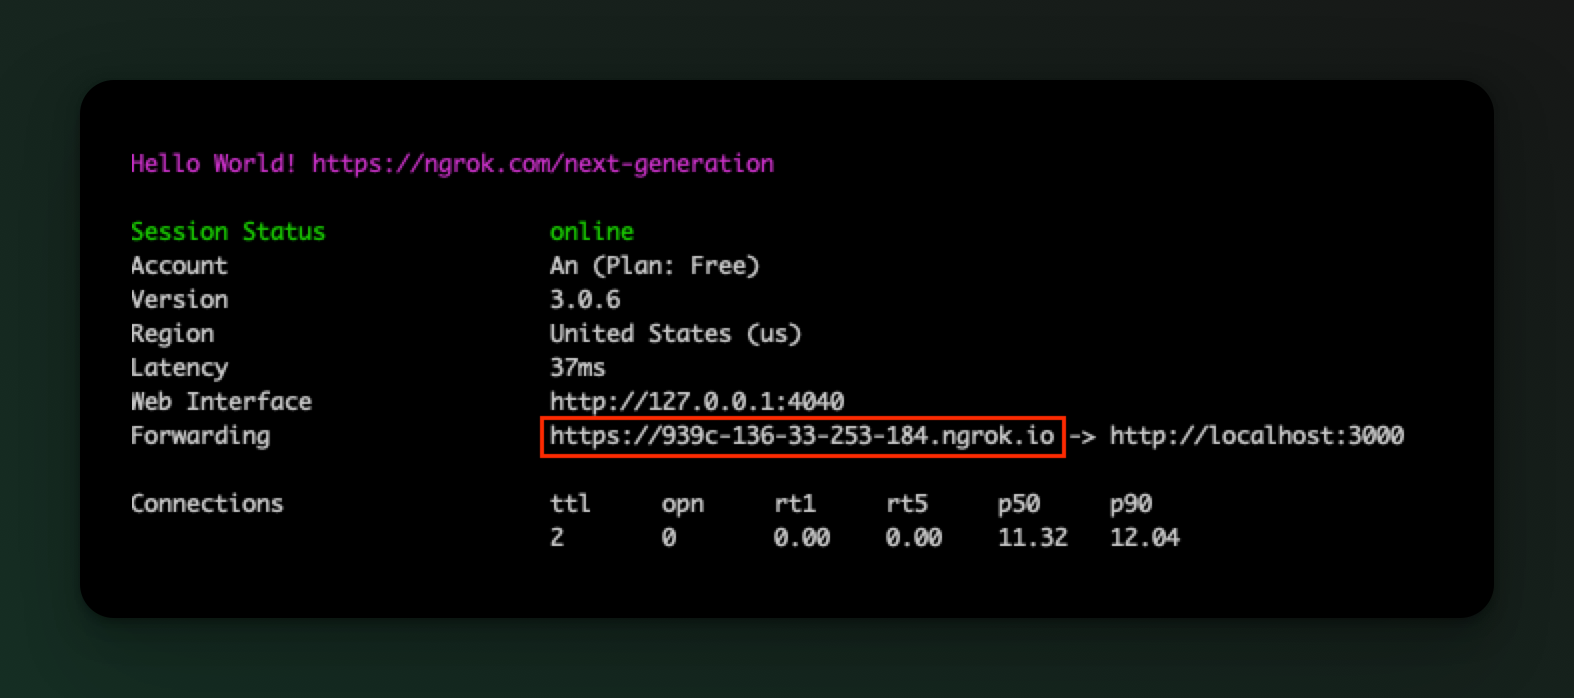
$ ngrok config add-authtoken <token> - Start a tunnel to the port of your choosing by typing the following code in your terminal
$ ngrok http 3000 - Copy the forwarding URI from the session detail window.
- Change the Application Homepage and Redirect URIs in your App. To view your Client ID and secret, find your App in the Workspace Applications section in the Integrations pane. Click the "View details" button to make changes. Set the ngrok forwarding URL as the App's homepage, and the forwarding url with
/authadded to the end as the redirect URL. For example:https://939c-136-33-253-184.ngrok.io/auth
Step 2: Launch a starter App
To help you get started faster, we've created a Node.js app that will handle authorization and allow you to make your first request to the Webflow API.
-
Clone the starter app repository and install dependencies
# Note: If on Windows, run # git clone -c core.symlinks=true https://github.com/Webflow-Examples/webflow-app-starter-v2 # instead to ensure correct symlink behavior git clone https://github.com/Webflow-Examples/webflow-app-starter-v2 # Install dependencies npm install -
Customize the
.envfile with your own Client ID and Secret, as well as the forwarding address from ngrok and the port of your choice.# You can get your client credentials from your workspace dashboard WEBFLOW_CLIENT_ID=XXXXX WEBFLOW_SECRET=XXXXX # If testing with Ngrok, get the forwarding url from the session detail window. SERVER_HOST=https://XXXX.ngrok.io PORT=3000 -
Start your App
# Run the app
npm run dev
Step 3: Install your starter App and make your first API call!
Now that your App is running, let's install it to a Workspace, and make our first call to the API. App will direct a user Once selected, Webflow will redirect the user back to the App where we can make our first request to the site's API.
- Open your browser, and navigate to your ngrok forwarding link.
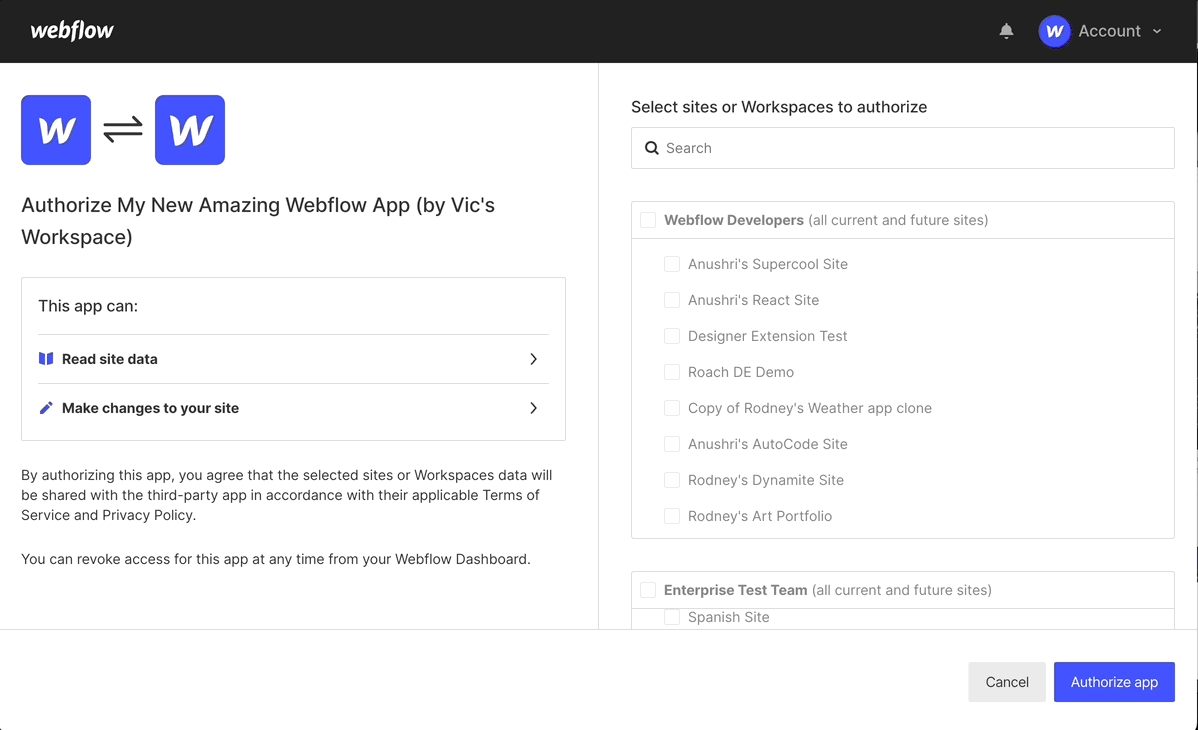
- Click the "Authorize with Webflow" button. This will take you to Webflow's authorization screen for the App you've just registered.
- Choose the Workspaces and/or Sites the App should be allowed to access, and click "Authorize Application." Webflow should direct you back to the App's home screen.
- Click "List Sites" to make an authenticated request to the "List Sites" endpoint.
🎉You did it!
Your App can now be Authorized by a user, authenticate via OAuth 2.0, and make requests to the API. Onwards and upwards!
Updated 4 days ago